
How to put on a Tattoo Sticker
Applying a tattoo sticker is a simple and fun way to express yourself without the permanence of a real tattoo. Whether you’re trying it out for a party, a costume, or just for everyday style, here’s a step-by-step guide to ensure your temporary tattoo looks great and lasts as long as possible.
Step 1: Choose Your Design
First, select a tattoo sticker that reflects your style or the occasion.
Step 2: Cut and Peel
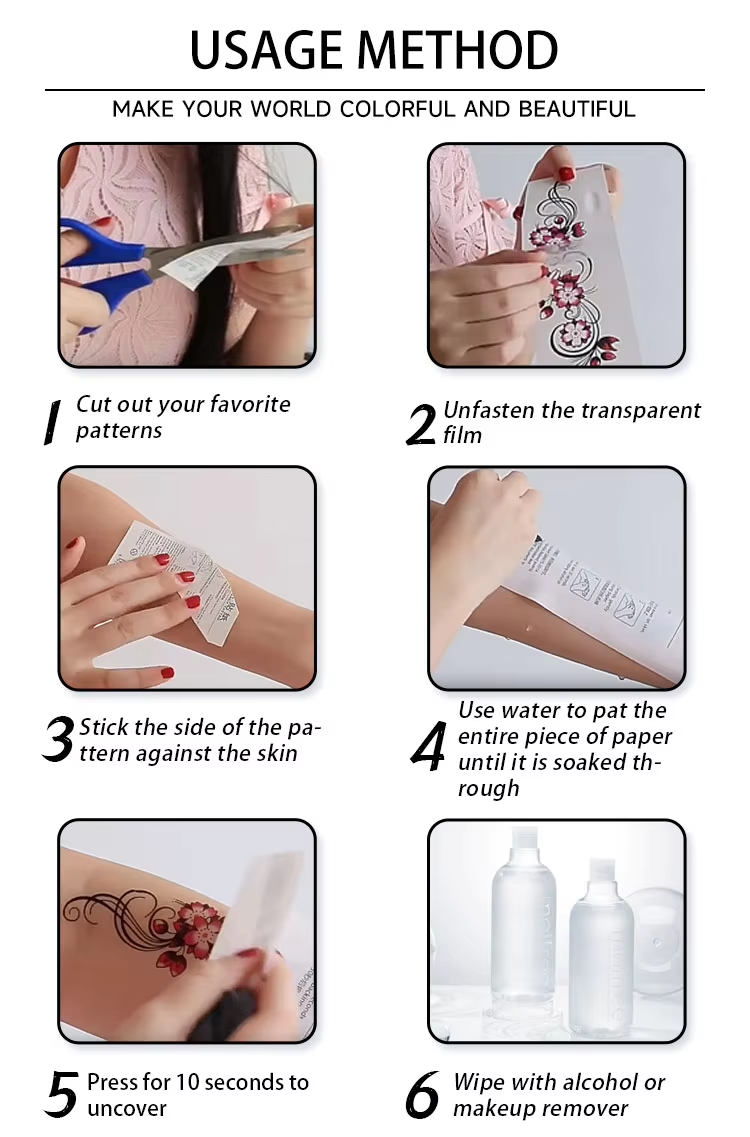
If your tattoo is part of a sheet with multiple designs, use scissors to cut out your chosen tattoo. Then, peel off the clear protective sheet on top of the tattoo.
Step 3: Placement
Decide where you want to place the tattoo. Once you’ve chosen the perfect spot, press the tattoo face down onto your skin without moving it around.
Step 4: Apply Water
Soak a sponge or cloth in water and press it firmly against the tattoo paper. Make sure the entire paper is soaked through to ensure the design transfers completely onto your skin.
Step 5: Reveal
Gently peel off the paper backing starting from one corner. If the tattoo hasn’t fully transferred, apply the wet sponge or cloth for a little longer.
Step 6: Dry and Set
Once the paper is removed, let the tattoo air dry for a few minutes. Avoid rubbing the area to prevent smudging.
Step 7: Prolong
For a longer-lasting effect, some people suggest applying a thin layer of clear nail polish over the tattoo. This step is optional and should be done with caution if you have sensitive skin.
Step 8: Removal
When you’re ready to remove the tattoo, rubbing alcohol, baby oil, or adhesive tape can be used to peel it off.
Remember, the key to a perfect temporary tattoo is patience and careful application. Enjoy your new look!